- TuringBot provides Python bindings with zero pip dependencies—the core engine is compiled C++
- Call TuringBot from Python scripts while getting native C++ performance
- No Julia runtime required (unlike PySR), no scikit-learn dependency chain (unlike gplearn)
- Results stream in real-time; access partial solutions while search continues
Why TuringBot Instead of Pure Python Libraries?
| Aspect | TuringBot + Python | PySR | gplearn |
|---|---|---|---|
| Setup | Simple installer | pip + Julia install | pip + sklearn |
| Engine | Compiled C++ | Julia JIT | Python/NumPy |
| GUI option | Yes | No | No |
| Error metrics | 15 built-in | MSE, MAE + custom | Limited |
Step #1: Download TuringBot
Download TuringBot for Windows or Linux. It's a standalone binary—no pip install, no dependency conflicts.
Step #2: Import TuringBot
Once you have the program installed, import it in Python with the following syntax, making sure to replace “user” with your local username:
import sys
sys.path.insert(1, r'C:\Program Files (x86)\TuringBot\resources')

import turingbot as tb
If you are in Linux, you can equivalently use:
import sys
sys.path.insert(1, r'/usr/lib/turingbot/resources')

import turingbot as tb
After that, TuringBot will be imported and ready to go.
Step #3: Start the Symbolic Regression search
The optimization is started like this:
sim = tb.simulation()
sim.start_process(path, input_file, threads=4, config=config_file)
The 4 parameters that you see are:
- path: the path to the TuringBot executable.
- input_file: the path to your input file, which must contain one variable per column.
- threads (optional): the number of threads that the program should use.
- config (optional): the path to the configuration file.
For instance, if you are on Windows, the paths would look something like this:
path = r'C:\Program Files (x86)\TuringBot\TuringBot.exe'
input_file = r'C:\Users\user\Desktop\input.txt'
config_file = r'C:\Users\user\Desktop\settings.cfg'
And on Linux:
path = r'/usr/lib/turingbot/TuringBot'
input_file = r'/home/user/input.txt'
config_file = r'/home/user/settings.cfg'
Once you run the start_process() method, the optimization will start in the background. You can refresh the current functions in real-time with sim.refresh_functions():
sim.refresh_functions()
print(*sim.functions, sep='\n')
print(sim.info)
Output format: [complexity, error, formula]
[1, 177813.0, '186276']                    # Constant baseline
[3, 7890.39, '11.7503*x']                  # Linear: 95.6% error reduction
[5, 6895.25, '11.9394*(-472.889+x)']       # Affine
[7, 1769.0, '(10.4154+3.9908e-05*x)*x']    # Quadratic: 99.0% error reduction
[11, 1666.42, '(9.10666+3.26179e-05*x)*(1.156*(-93.3986+x))']
[21, 1224.31, '-1624.3+((9.18774*sign(x-10.1264)+3.13847e-05*x)*(1.1586*(-158.606+x)))']
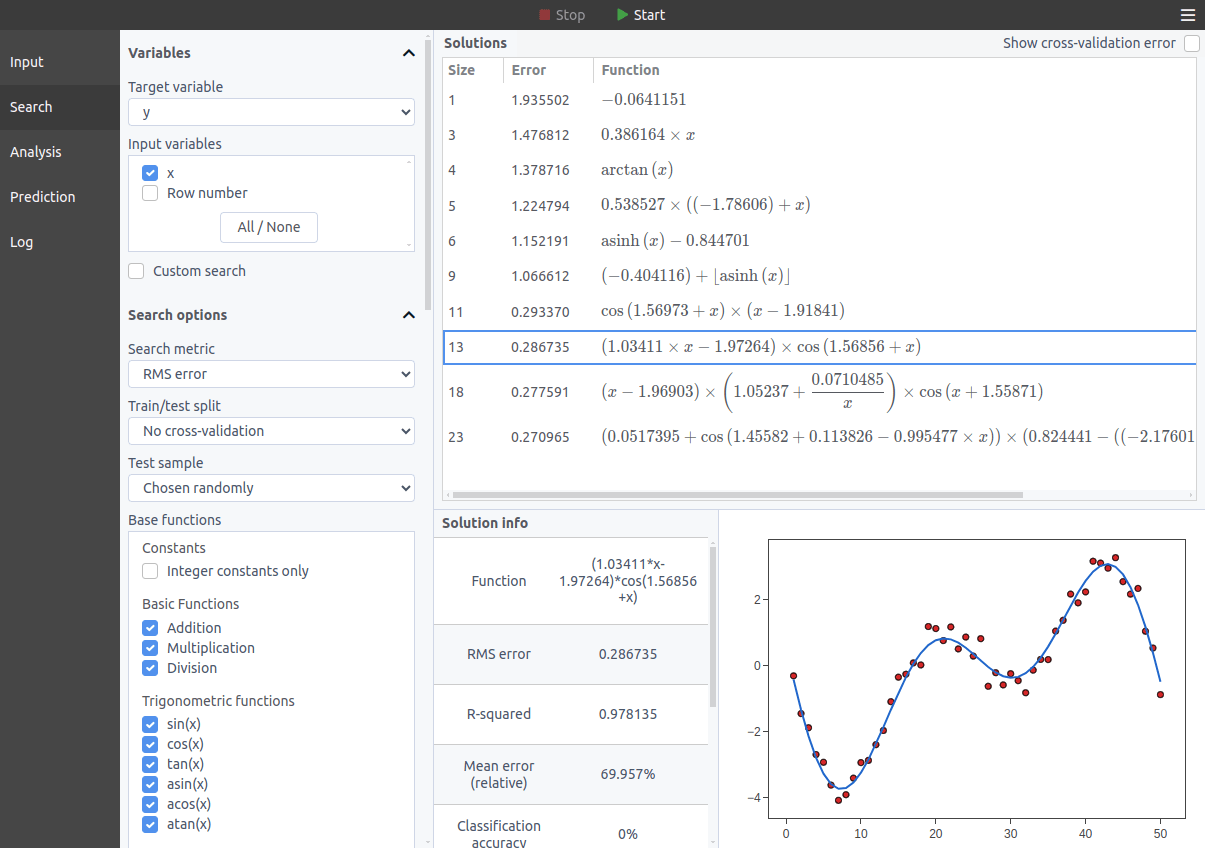
This Pareto front shows the accuracy/complexity tradeoff—pick the formula that fits your needs.
Tip: Customizing your search
By default, the last column of your input file will be the target variable, and all other columns will be used as input variables.
But you can change that as well as several other options by providing the program with a configuration file, that looks like this:
search_metric = 4 # Search metric. 1: Mean relative error, 2: Classification accuracy, 3: Mean error, 4: RMS error, 5: F-score, 6: Correlation coefficient, 7: Hybrid (CC+RMS), 8: Maximum error, 9: Maximum relative error, 10: Nash-Sutcliffe efficiency, 11: Binary cross-entropy, 12: Matthews correlation coefficient (MCC), 13: Residual sum of squares (RSS), 14: Root mean squared log error (RMSLE), 15: Percentile error
train_test_split = -1 # Train/test split. -1: No cross-validation. Valid options are: 50, 60, 70, 75, 80, 100, 1000, 10000, 100000
test_sample = 1 # Test sample. 1: Chosen randomly, 2: The last points
train_test_seed = -1 # Random seed for train/test split generation when the test sample is chosen randomly.
integer_constants = 0 # Integer constants only. 0: Disabled, 1: Enabled
bound_search_mode = 0 # Bound search mode. 0: Deactivated, 1: Lower bound search, 2: Upper bound search
maximum_formula_complexity = 60 # Maximum formula complexity.
history_size = 20 # History size.
fscore_beta = 1 # F-score beta parameter.
normalize_dataset = 0 # Normalize the dataset before starting the optimization? 0: No, 1: Yes
allow_target_delay = 0 # Allow the target variable in the lag functions? 0: No, 1: Yes
force_all_variables = 0 # Force solutions to include all input variables? 0: No, 1: Yes
custom_formula =  # Custom formula for the search. If empty, the program will try to find the last column as a function of the remaining ones.
allowed_functions = + * / pow fmod sin cos tan asin acos atan exp log log2 log10 sqrt sinh cosh tanh asinh acosh atanh abs floor ceil round sign tgamma lgamma erf # Allowed functions.
The definitions of those settings can be consulted on the Official Documentation.